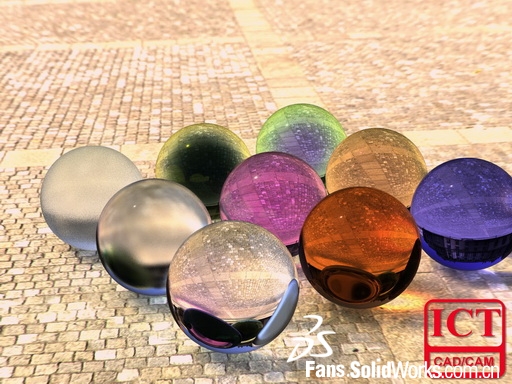
SolidWorks offers incredible rendering capabilities that can produce highly realistic visuals, like this:
Below, let's explore how to achieve such a stunning rendering effect.
**Modeling**
Start by creating some simple shapes, like spheres, which can be modeled quickly, one after another, resembling eggs or small balls.

**Pre-Rendering Setup**
This stage involves several key elements: lighting, camera setup, perspective, materials, Photoview settings, and background.
First, choosing the right material is crucial. I selected the modo material library and added glass materials individually based on my preferences. However, the result looked less appealing—turning the spheres into transparent objects, which wasn’t ideal for the desired realism.


Next, setting up the light sources is essential. Make sure to enable the relevant options so that the lighting works properly during rendering. Otherwise, you'll only see the lighting effect in SolidWorks, not in the final render. Adjust the illumination range and keep other settings as default unless you have specific needs.

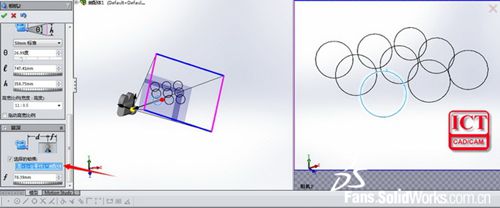
To enhance realism, use a camera view. Insert a camera, then drag the black arrow to adjust the angle of view using the preview. The depth of field feature helps simulate focus, making the main object sharp while blurring the background, which adds a more natural feel.
Now, set up the background. In SolidWorks 2014, there’s a new "patterned floor" option that makes it easy to place parts on the ground, preventing them from floating in mid-air.

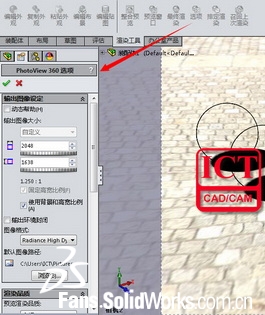
After setting up the camera, move to the Photoview 360 settings. This is an important part of the pre-rendering process. You can access detailed explanations through the "Dynamic Help" or online documentation. For best results, choose high HDR format when exporting your images, as some formats may not support all rendering settings.

**Rendering**
Before the final render, you can check the preview to see the lighting, reflections, and overall look. Once satisfied, proceed with the full render. The process can take over an hour depending on your system's CPU power. While it renders, you can take a break and grab a cup of tea.
**Post-Rendering Adjustments**
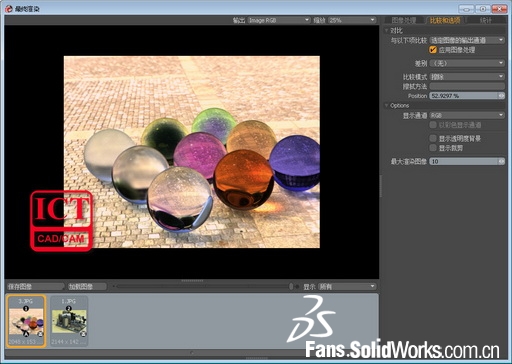
Once the render is complete, you might notice that the image is too bright, leading to weak shadows and low contrast. However, the depth of field and material quality are good. To improve the image, adjust the tone mapping to balance brightness and darkness, increase the input white level to reduce overall exposure, and compare before and after to select the best version.

With these steps, you can create highly realistic visualizations in SolidWorks, bringing your designs to life with professional-quality results.
Pvb Film-High-End,Pvb Interlayer,Polyvinyl Butyral Film,Pvb Interlayer Film
Kerryya (Chongqing) Co., Ltd , https://www.cqhkpvb.com